Keep It Dry: How to Install a Residential Sump Pump
Residential sump pump installation is a vital step in protecting your home from water damage, reducing mold growth, and safeguarding your property value. In case you just want a quick overview, here's how to install a sump pump in simple steps:
- Choose Location: Find the lowest area in your basement where water collects.
- Dig the Pit: Excavate and place the sump basin securely.
- Install the Pump: Position the sump pump in the basin and connect discharge pipes.
- Connect Power: Plug the sump pump into a dedicated, grounded (GFCI) outlet.
- Test the System: Pour water into the basin to make sure the pump activates and discharges properly.
I'm Mike Martinez AHP, owner of Accountable Home Plumbing, with experience in residential sump pump installation across the Denver Metro area. My team and I have successfully protected countless homes through professional and efficient sump pump installations.
Understanding Sump Pumps: Your First Line of Defense Against Water Damage
Water damage is a homeowner's nightmare. Did you know roughly 14,000 homes in the U.S. experience water damage every single day? Whether it's due to heavy rainstorms, melting snow, rising groundwater, or plumbing issues—water has a sneaky way of causing costly damage over time.
When water makes its way into your basement or crawl space, you're not just looking at an immediate mess. Lingering moisture can weaken your home's structure, lower your property value, and even create health problems from mold and mildew growth. Luckily, there's a trusty hero that can save the day (and your basement floors): a sump pump.
How Sump Pumps Protect Your Home
Think of a sump pump as your home's tireless guardian, quietly protecting your basement or crawl space from unwanted water intrusion. But how exactly does it do this? Let me walk you through it.
First, water naturally flows to the lowest part of your home—usually your basement floor. A sump pump is strategically placed into a pit called a sump basin at your basement's lowest spot. This basin collects excess water that would otherwise spread across the floor.
Once the water in the basin reaches a certain point, the sump pump automatically switches on—no need to check constantly or manually empty anything (phew!). The pump quickly pushes this collected water through special discharge pipes, redirecting it safely away from your home's foundation.
This cycle repeats every time water levels rise, providing continuous, round-the-clock protection against flooding and moisture-related issues. One pro tip to keep your system running smoothly comes from plumbing expert David Balkan, who recommends: "Add check valves to pump outflows. Putting a simple check valve on the discharge pipe prevents water from flowing back into the sump pit after the pump shuts off. That way, the area stays dry."
Beyond preventing flooding in your basement, sump pumps offer even more peace of mind. By keeping your foundation consistently dry, they help preserve the structural integrity of your home, preventing cracks, settling, and other costly foundation troubles. They also keep mold and mildew growth at bay—protecting your family's health and your house's indoor air quality. (Your allergies will thank you!)
Types of Residential Sump Pumps
When considering a residential sump pump installation, it's helpful to know what options are available. Let's briefly explore the most common types to find the best fit for your home and budget.
Submersible Sump Pumps are designed to work underwater—think of them as mini-submarines for your basement! Because they're submerged, they're quieter, more efficient at cooling themselves, and don't take up extra space in your home. They're great for finished basements or family rooms, where you'd prefer not to hear the pump running.
Pedestal Sump Pumps stand above the waterline with a motor mounted on a tall pedestal. Only their intake pipe dips into the water. They're more budget-friendly, easier to access for maintenance, and tend to last longer since their motors aren't submerged. These pumps are ideal for unfinished basements where noise and aesthetics aren't a major concern.
Battery Backup Sump Pumps provide an extra layer of protection when storms knock out your electricity. These secondary pumps automatically kick on when your primary pump stops working or loses power. Many models come with alarms to let you know when there's an issue, and a fully charged battery can keep them pumping for several hours. If your area faces frequent storms or power outages, this is a smart investment.
Water-Powered Backup Sump Pumps offer another power-outage solution that doesn't rely on electricity or batteries. Instead, they use your home's water pressure to pull water out of your sump basin. These pumps can run indefinitely as long as you have city water pressure, making them a good choice if you have reliable municipal water service and moderate backup needs.
While choosing your sump pump, you'll also notice some material differences. Cast iron pumps are durable, dissipate heat more effectively, and generally have a longer lifespan, making them a favorite among plumbing pros. Thermoplastic pumps, on the other hand, are lighter, resistant to rust, and usually cost less—ideal for lower-budget situations or lighter use.
Finally, let's talk horsepower. Most residential sump pumps come in either 1/3 HP or 1/2 HP models. A 1/3 HP sump pump suits most average homes perfectly. If you have a larger basement or live in a flood-prone area, upgrading to a 1/2 HP pump can deliver the extra protection you'll need. Just remember, bigger isn't always better—selecting the right-sized pump for your home's specific needs will ensure efficiency and longevity.
With a clear understanding of sump pumps and their benefits, you're well on your way to keeping your home dry, safe, and comfortable. Ready to get started with your own residential sump pump installation? Our team at Accountable Home Plumbing is here to help you protect your Denver Metro home from water damage—because prevention is always better than damage control.
Determining If You Need a Residential Sump Pump Installation
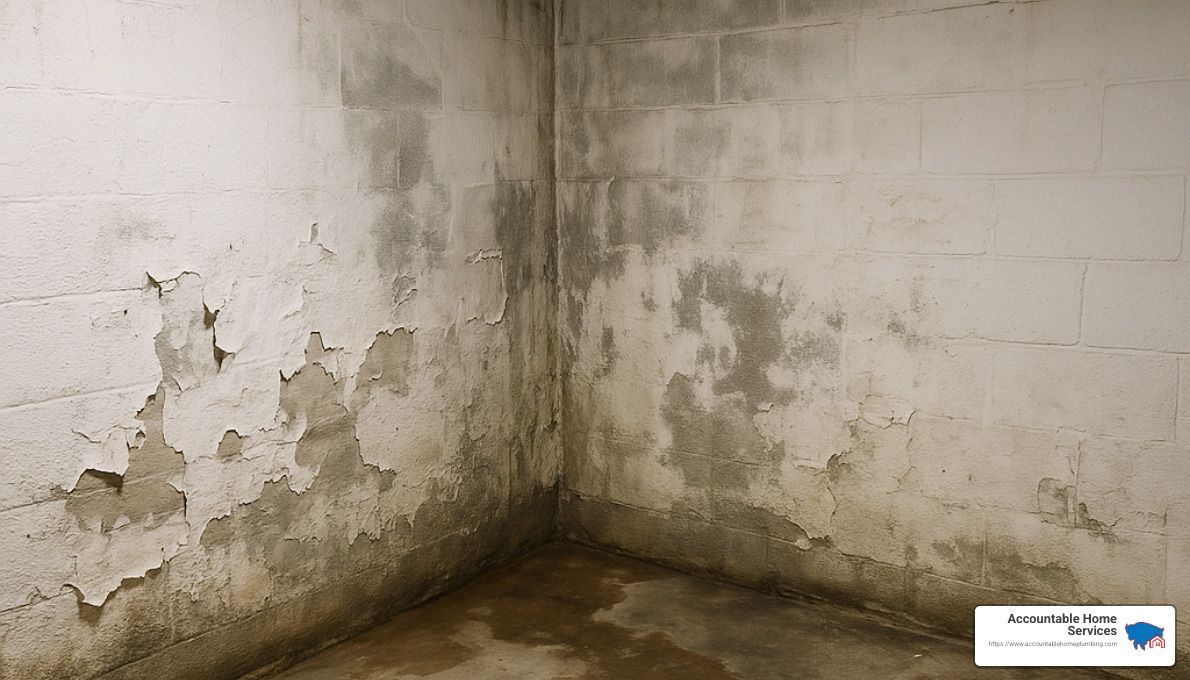
Not every home needs a sump pump—but many more homes could benefit from one than you might think. If you've ever walked into your basement or crawl space and found wet spots, puddles, or worse, inches of water, installing a sump pump could save you from future headaches.
But sometimes the signs aren't as obvious as standing water. Take a moment to look closely around your basement. Do you notice water stains on the walls or floor? These indicate that water has been sneaking inside, even if things look dry right now. Another common indicator is efflorescence, a fancy word for those white, powdery deposits left behind when water evaporates from concrete or masonry surfaces.
Your nose can also help you detect hidden moisture problems. That persistent musty odor isn't just the "basement smell" we all joke about—it's often a sign of mold growth caused by excess dampness. Mold isn't just unpleasant; it can lead to health issues and damage your belongings (and your home's structural materials) over time.
And speaking of structural concerns, watch out for warped materials like buckling floors, peeling paint, or rusty metal fixtures. Even foundation cracks, especially those that appear or grow after heavy rains, can signal extra water pressure against your foundation. Installing a sump pump can relieve this hydrostatic pressure, protecting your home's foundation from further damage.
Here's a real-life example from a homeowner in Colorado who learned the value of a sump pump firsthand:
"I tried to ignore the occasional dampness in my basement—until I realized mold was ruining things I'd stored down there. After investing in residential sump pump installation, not only did the water problems vanish, but the air quality throughout my entire home improved dramatically."
In addition to these visible signs, certain environmental factors increase the risk of water intrusion into your basement or crawl space. For instance, if your home sits in an area with a naturally high water table, experiences frequent rainfall, or deals with significant seasonal moisture (think melting snow in spring), a sump pump becomes even more important.
Flat or low-lying properties also face higher risks of water accumulation, simply due to how water naturally moves and pools. If this sounds like your home, adding a sump pump can make a huge difference in preventing future flooding and moisture issues.
Choosing the Right Location for Your Sump Pump
If you've decided a sump pump is a smart move, choosing the perfect location is your next critical step. After all, placement matters—your pump can only protect your home if it's installed where water naturally accumulates.
Always start by installing your sump pump at the lowest point of your basement or crawl space. As the experts say, water won't flow uphill without a little help, so let gravity do some of the work for you. Basement corners usually work best—they're typically out of the way, structurally supportive, and naturally attract water due to how basements are constructed.
Placing the pump near foundation footings is another smart move. By intercepting water early, before it spreads into your living space, you'll keep your basement clean and dry.
Additionally, consider your home's soil composition. If you're dealing with dense clay soil, water might linger longer, making strategic pump placement even more crucial. On the flip side, sandy soils drain faster but may allow water to seep in from multiple directions. Knowing your soil type helps you choose the most effective location to intercept water and keep your basement dry.
Accessibility matters, too. You'll need to perform occasional maintenance and checks, so don't tuck your sump pump away in an impossible-to-reach spot. Finally, think carefully about your discharge path, planning a direct route that safely carries water away from your home without freezing or causing other problems.
One seasoned sump pump installer here in the Denver Metro area shared a helpful trick:
"To find the best spot for residential sump pump installation, sometimes I just watch a home's basement during heavy rain. Wherever the water first appears—that's usually the ideal location for your pump."
For more detailed guidance on sump pump placement, check out this helpful resource: The Ultimate Guide to Sump Pump Installation Locations.
Installing a sump pump may not be glamorous, but protecting your basement, your belongings, and your peace of mind? That's priceless.
Essential Tools and Materials for Residential Sump Pump Installation
Before you dive into your residential sump pump installation, preparation is your best friend. Having all the right tools and materials at your fingertips will save you from mid-project trips (or frustration-fueled coffee breaks). Let's walk through everything you'll need to set yourself up for sump pump success.
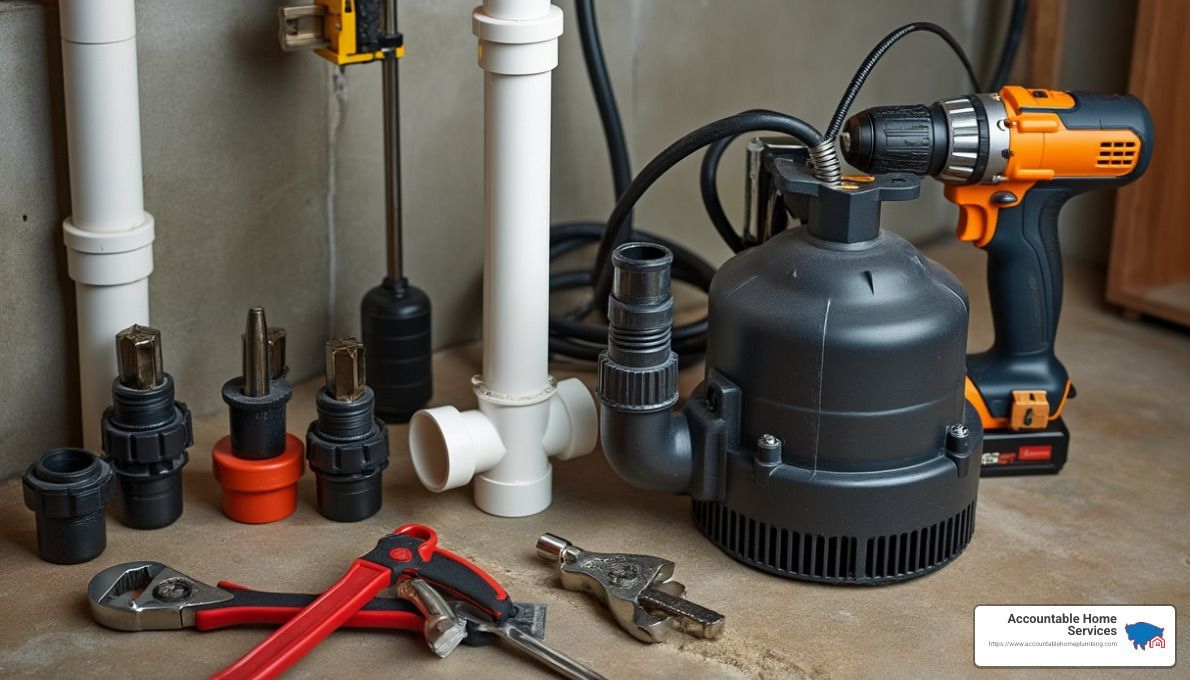
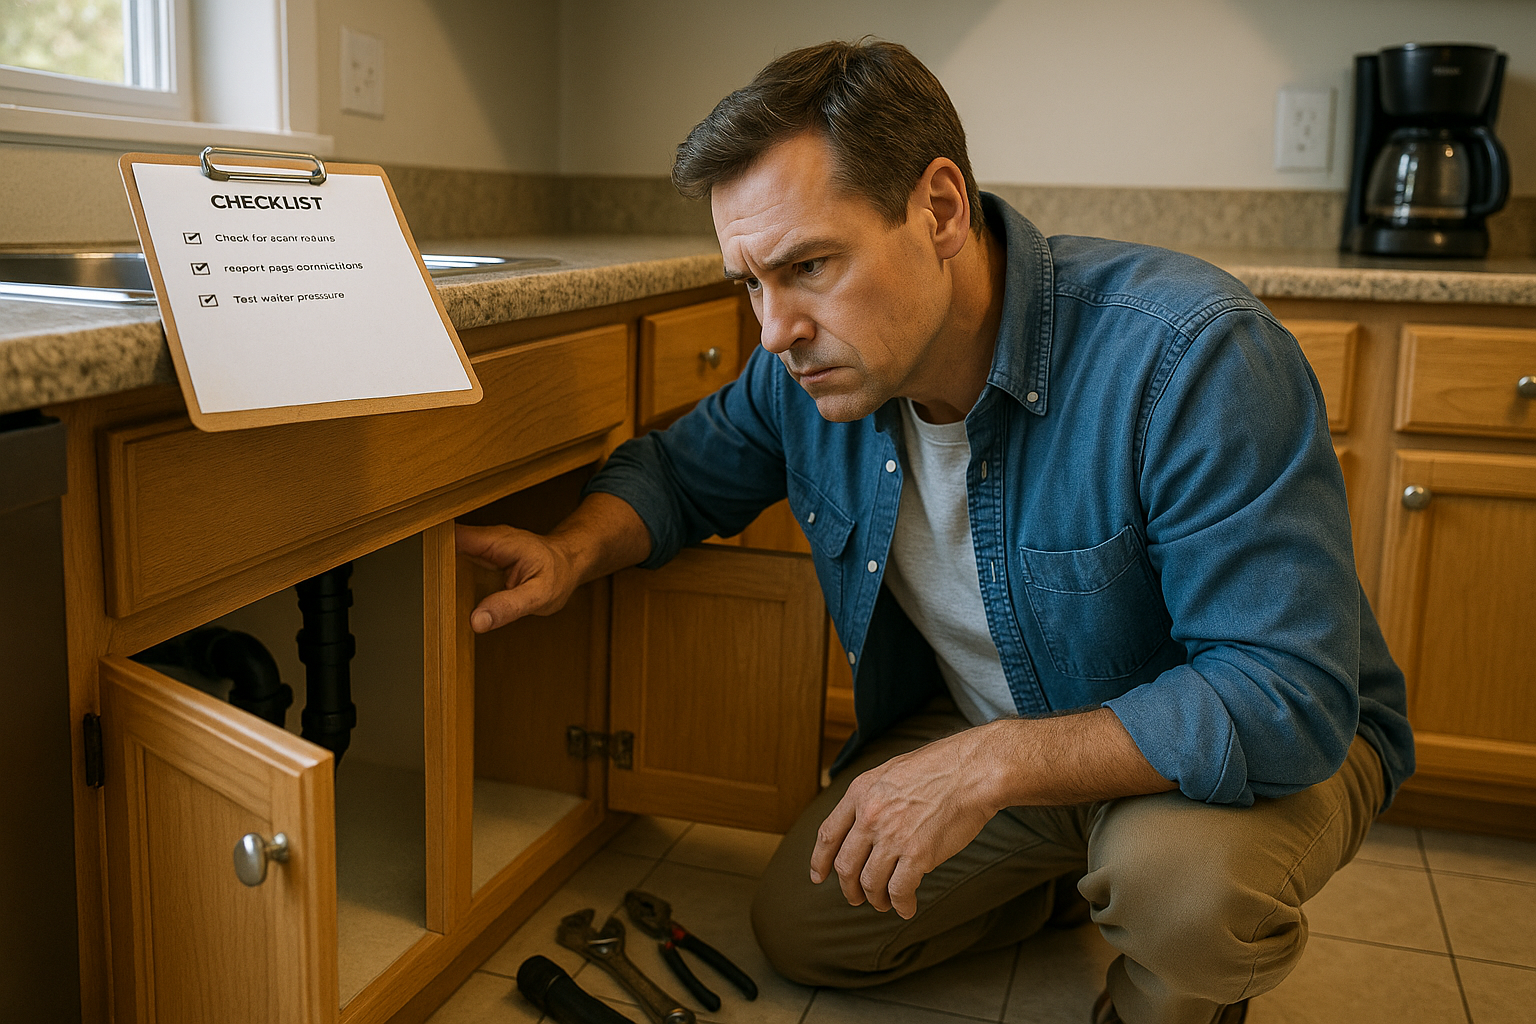
Tools Checklist
First off, you'll need some muscle to break through your basement floor and dig out the sump pit. A jackhammer or sledgehammer will easily break through concrete, and a sturdy shovel (along with a handy bucket) helps clear debris out of your way.
When placing your sump pump, accuracy counts. You'll want a reliable tape measure and level to keep everything straight and precise. Don't forget something simple like a marker or pencil (or even a chalk line) for clearly marking where you'll cut and dig.
Next up, cutting and fitting pipes is a key step, so make sure you have a hole saw (for basin drain holes), a PVC cutter or hacksaw, and a sharp utility knife. Trust me—PVC pipes don't cut themselves!
To assemble everything snugly, keep a couple of wrenches handy—an adjustable wrench and a good pipe wrench will do wonders. A solid screwdriver set (both flathead and Phillips) and some trusty pliers will round out your tool arsenal nicely.
Safety first, friends! Protect yourself with safety glasses, work gloves, ear protection (especially if using that jackhammer), and a dust mask or respirator. Knee pads aren't a bad idea either—your knees will thank you later.
Finally, don't overlook the electrical side. Grab a non-contact circuit tester for safely checking existing outlets and a wire stripper if you're wiring in a new one. A shop vacuum is also helpful to tidy up debris as you go, and some plastic sheeting keeps surrounding areas neat and clean.
Materials Checklist
Now that your tools are sorted, let's talk materials. The heart of your system includes the sump pump itself (submersible or pedestal—whichever fits your needs best), a sturdy sump basin (usually around 18-24 inches wide and 22-30 inches deep), and a proper basin cover with cutouts for pipes and cords.
Your plumbing materials are equally important. Choose quality PVC pipe (typically 1.5 or 2-inch diameter), and don't skimp on the essential check valve—this stops water from flowing back into the pit. Stock up on a few PVC elbows (45° and 90°), reliable PVC cement and primer, a sturdy rubber coupling with clamps, and some pipe straps or hangers to secure the discharge line. Don't forget Teflon tape for sealing threaded connections tightly.
To create a proper base for your sump basin, you'll need coarse gravel for drainage, quick-setting concrete mix to secure the basin, and concrete screws or anchors if you're anchoring the basin to the floor.
Sealing out water is key, so have some quality silicone caulk and waterproof hydraulic cement on hand to seal wall penetrations. A bit of extra waterproof sealant never hurts either!
For electrical work, a safe and code-compliant setup involves a GFCI electrical outlet (if you don't already have one nearby). If you're installing a new outlet, have an electrical box, a secure cover, proper electrical wire, and cable staples or clips to neatly secure the pump's power cord.
Lastly, consider a few optional (but highly recommended) upgrades: a battery backup system for power outages, a water alarm for peace of mind, a sump pump stand or simple bricks to lift your pump slightly, and filter fabric to keep debris from clogging your basin.
A seasoned Denver plumber once wisely advised: "Never try to save a few bucks by cutting corners on your check valve or discharge pipe. Invest in high-quality materials upfront. Your home (and your future self) will thank you!"
Expect to budget roughly $300–$600 in materials for a DIY sump pump installation. The pump itself usually runs around $50–$200, depending on type and features you choose. If you prefer professional expertise, my team at Accountable Home Plumbing is always here with upfront pricing and zero hidden fees—guaranteed.
Step-by-Step Residential Sump Pump Installation Guide
Now that you understand the importance of a sump pump and have gathered all necessary tools and materials, let's walk through the installation process. This comprehensive guide will help you complete a successful residential sump pump installation or better understand what professionals like our team at Accountable Home Plumbing will do during the installation.
Step 1: Preparation and Planning
Before you start breaking concrete or digging holes, proper preparation will save you headaches down the road. Trust me, I've seen what happens when folks skip this step!
First things first, pick up the phone and contact your utility companies by calling 811. This free service marks underground utilities so you don't accidentally turn your sump pump installation into a much bigger (and potentially dangerous) project. It's not just a good idea—it's a crucial safety step.
Next, take some time to plan your discharge route. The water needs somewhere to go, and that somewhere should be at least 10-20 feet away from your foundation, flowing downhill and away from your home. Check with your local building department too—many municipalities have specific requirements about where you can discharge water. And whatever you do, don't send it into your septic or sewer system!
"Planning the discharge route is often overlooked, but it's one of the most critical aspects of the installation," one of our Denver-based plumbers often tells customers. "If the water isn't properly directed away from the home, you can end up creating the very problem you're trying to solve."
Before you dig, verify your electrical setup. Your sump pump needs a properly grounded GFCI outlet within cord's reach. No outlet nearby? You'll need to install one or call an electrician. And sorry, but extension cords aren't an option for permanent installations—they're just not safe for this application.
Finally, clear your workspace and use chalk to mark where your sump basin will go. Add 3-4 inches around the perimeter for gravel backfill. Lay down some plastic sheeting too—your future self will thank you when cleanup time comes!
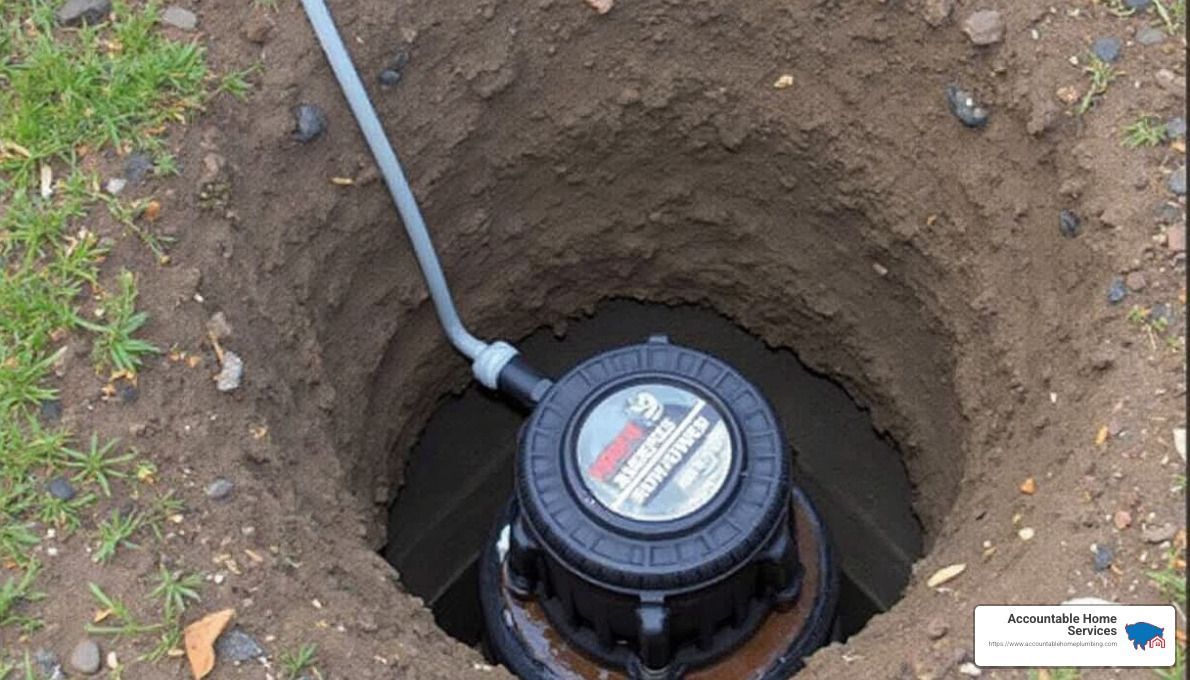
Step 2: Digging the Sump Pit
Roll up your sleeves—this is where the real work begins.
Start by breaking through the concrete within your marked area. Whether you're using a jackhammer (recommended) or a sledgehammer (good luck!), work slowly and methodically. This isn't a race, and you definitely don't want to damage anything beyond your marked perimeter.
Once you've broken through, clear away the concrete debris and start digging. You'll need a hole that's about 8 inches deeper than your sump basin and wide enough to leave 3-4 inches of space all around. Keep the hole at least 8 inches away from foundation walls to avoid undermining your foundation's structural integrity.
With the hole dug, prepare a solid base by adding 4-6 inches of gravel to the bottom and compacting it well. This creates drainage under the basin and gives it a stable foundation.
Now it's time to position the basin in the hole. Check that it's level—this is crucial for proper pump operation. The top rim should be flush with or slightly (about half an inch) above your floor level.
If your basin doesn't already have them, drill several 3/8-inch holes in the sides and bottom. These allow water to enter the basin from the surrounding soil.
Add gravel backfill around the basin, filling the space up to about 3-4 inches from the top. Then mix and pour concrete around the top of the basin to seal it to the floor. Create a slight slope away from the basin to direct any surface water toward the pit.
Let the concrete cure completely before moving on. I know it's tempting to rush ahead, but giving it 24-48 hours to set properly will prevent headaches later.
As one homeowner shared with me: "Breaking through the concrete was definitely the hardest part, but taking my time and using proper safety equipment made all the difference. I rented a jackhammer from a local hardware store which made the job much easier than trying to use a sledgehammer."
Step 3: Installing the Sump Pump and Basin
With the hard labor behind you, it's time for the main event—installing the actual pump.
First, prepare your pump according to the manufacturer's instructions. Different models have different assembly requirements, so take a few minutes to read through the manual.
When positioning the pump in the basin, follow these pro tips: Place a brick or pump stand at the bottom to raise the pump slightly off the basin floor (this prevents it from sucking up sediment). Center the pump so the float switch can move freely without getting caught, and make sure everything is level for optimal performance.
Now it's time to connect the discharge pipe. Start by attaching the appropriate adapter to the pump's discharge port, using Teflon tape on threaded connections for a watertight seal. Install a check valve above the pump—pay attention to the directional arrow on the valve to ensure it's oriented correctly. Then connect a short vertical section of PVC pipe above the check valve.
Don't forget to drill a small weep hole (about 3/16-inch) in the discharge pipe between the pump and check valve. This little hole serves a big purpose—it prevents air-lock in the pipe and reduces starting surge current.
As one of our experienced plumbers explains: "A few inches above the pump exit, in the discharge piping, deep in the pit, there should be a bleeder hole. This hole prevents airlock and it reduces the starting surge current. By having this water drain, the pump doesn't need to push on as much static water to get going."
Finally, adjust the float switch to ensure it moves freely without touching the sides of the basin or any pipes. The switch should allow the pump to turn on when water reaches about 7-10 inches deep and turn off when the water level drops to 2-3 inches.
Step 4: Setting Up the Discharge System
The discharge system is your pump's pathway to actually remove water from your home, so let's get it right.
Begin by planning the most direct pipe route from your pump to the exterior of your home. Every bend reduces efficiency, so keep it as straight as possible. If you need to make turns, use 45° elbows rather than 90° when possible—they create less resistance to water flow.
Next, you'll need to create a wall penetration for the pipe to exit your home. Mark the spot, drill a pilot hole from the inside, then use a hole saw or masonry bit to create a hole large enough for your pipe (typically 2-3 inches in diameter). Make sure the hole slopes slightly downward toward the exterior to help water flow out.
Now install the horizontal pipe run from the vertical section above the check valve to your exit point. Support the pipe every 4-5 feet with hangers or straps, and maintain a slight downward slope toward the exit point.
For the exterior discharge setup, extend the pipe at least 10-20 feet from your foundation. Install a grated discharge cap or screen to prevent debris or animals from entering, and consider a freeze guard if you live in a cold climate like Colorado. Place a splash block or create a small gravel bed at the discharge point to prevent soil erosion.
Don't forget to seal the wall penetration thoroughly. Apply hydraulic cement or waterproof sealant around the pipe where it exits the foundation wall, and use silicone caulk on the exterior side. This prevents water from seeping back into your home around the pipe—a common issue we see in poorly installed systems.
"The discharge line should be as straight as possible," one of our plumbing professionals always advises. "Each bend reduces efficiency and increases the chance of clogging or freezing in winter. If you must use elbows, use 45-degree rather than 90-degree fittings whenever possible."
Step 5: Electrical Connections and Testing
You're in the home stretch! Now let's power up and test your system.
Start by ensuring proper electrical setup. Your pump needs a dedicated GFCI outlet, and it should never be connected via an extension cord. If you're installing a new outlet, make sure it's on a dedicated circuit and installed according to local electrical codes. When in doubt, consult an electrician—water and electricity don't mix, so this isn't the place to cut corners.
When connecting the pump, for models with float switches, you'll typically connect the pump plug into the back of the float switch plug (what's called a piggyback configuration), then plug the float switch into the GFCI outlet. Secure all cords to prevent them from interfering with the float or falling into the water.
The moment of truth comes when you test the system. Slowly pour 5-10 gallons of water into the sump pit and watch as the float rises and the pump activates. Observe the entire cycle to ensure the pump turns on and off properly, check all connections for leaks, and verify that water is being discharged properly outside.
Once everything's working smoothly, install the cover over the basin, ensuring all pipes and cords pass through appropriate openings. Secure the cover according to the manufacturer's instructions—this prevents debris from falling in and reduces radon gas if that's a concern in your area.
Before you call it a day, perform some final checks: Listen for unusual noises during operation, verify that the float switch has adequate clearance, ensure the pump turns off when the water level drops, and check outside to confirm water is being discharged properly.
A Denver homeowner recently told me: "After installation, I ran several tests with different amounts of water to make sure everything was working properly. I was amazed at how quickly the pump removed the water, and the peace of mind knowing my basement is now protected is worth every penny spent on the installation."
While residential sump pump installation is certainly a project many homeowners can tackle themselves, don't hesitate to call professionals like us at Accountable Home Plumbing if you encounter any challenges or simply prefer the peace of mind that comes with professional installation. We've installed countless sump pumps throughout the Denver Metro area and can ensure your system is set up correctly the first time.
Common Mistakes to Avoid During Sump Pump Installation
You've planned your installation carefully, gathered your tools, and you're ready to protect your home from water damage. But before you dive in, let's explore some common pitfalls homeowners encounter with residential sump pump installation—and how you can easily avoid them.
One of the biggest mistakes is picking a sump pump that's the wrong size. A pump that's too small won't handle heavy rains effectively. On the flip side, choosing one with excessive horsepower can cause it to cycle too frequently, wearing it out prematurely. Experts often note, "A motor that's too powerful might keep your sump pump running nonstop, burning out the motor faster than you'd like."
Another common issue is digging a sump pit that's too shallow. A shallow pit can cause your pump to cycle on and off way too often, shortening its lifespan. Make sure your pit is at least 22 inches deep, so your pump has plenty of room to work efficiently.
Skipping the check valve is another mistake that homeowners sometimes make. Without it, water left in your discharge pipe flows right back into the pit, triggering your pump repeatedly. This constant cycling is hard on the pump motor and leads to an early replacement. Always install a reliable check valve to keep water moving in the right direction.
It's also important to give your float switch plenty of room to move. If the float bumps into the sides of the basin, pump, or pipes, your sump pump won't know when to turn on or off properly. Keep the area clear for smooth operation.
When it comes to your discharge pipe, details matter. Homeowners commonly run into problems like choosing pipes that are too narrow, adding too many bends, or creating an insufficient slope. It's tempting to discharge water close to your foundation, but that only invites more trouble—aim for at least 10-20 feet away, downhill if possible.
Local building codes are there for a reason. Ignoring them might seem convenient, but it can lead to fines or even having to redo your installation entirely. Before you begin, check in with your local building department to ensure you're meeting all requirements.
Sealing everything properly is often overlooked but is essential. A poorly sealed sump basin or improperly sealed discharge pipe opening can let water slip past your system or even allow radon gas to enter your home. Use waterproof sealant or hydraulic cement around wall penetrations, and don't skimp on silicone caulk.
Finally, don't forget that little hole between your pump and check valve—the weep hole. Without it, air pockets can form, causing your pump to run dry and potentially burn out.
Electrical Safety Considerations
Water and electricity definitely don't mix, so electrical safety is critical during your installation. To protect yourself and your home, always plug your sump pump into a GFCI outlet. These special outlets shut off power instantly if they detect a dangerous electrical leak—essential protection in a wet area like your basement or crawl space.
Give your sump pump its own dedicated circuit. Sharing a circuit with other appliances or devices can overload it and risk shutting down your pump when you need it most. And please, avoid extension cords for permanent setups. They aren't designed to handle continuous high-power loads safely, can overheat, and create tripping hazards.
Neatly secure your cords above water level and away from your pump's float switch. Using simple clips or zip ties can help manage the excess cord and avoid interference. If installing new electrical outlets or circuits seems daunting, don't hesitate to hire a professional electrician. Trust us—it's cheaper than dealing with a damaged pump or worse, an electrical fire.
Discharge Line Best Practices
An effective discharge system is key to your sump pump's success. First off, choose the right size pipe. Most residential sump pumps need a 1.5-inch or 2-inch pipe. Going smaller might seem easier, but it only creates back pressure, slowing your pump down and shortening its life.
When routing your discharge line, try to keep bends and turns to a minimum. Every elbow you add makes the pump work harder. If you do need to use elbows, 45-degree fittings are friendlier to your pump than sharp 90-degree angles.
Always install your pipe with a consistent downward slope toward the exit. This prevents water from pooling inside, reducing the risk of freezing in cold Denver winters. Speaking of freezing, if you live in a colder climate, make sure your discharge pipe has proper insulation or is buried below the frost line to keep it from icing up.
As for the discharge location, aim to have water exit at least 10-20 feet from your foundation. This prevents water from immediately soaking back into your basement or damaging your foundation. Also, consider your neighbors—make sure you're not inadvertently dumping water onto their property either!
Lastly, double-check your check valve orientation. It should point away from your pump, clearly marked with an arrow that shows the direction water should flow. Failing to install it properly means water will keep coming back, forcing your pump to cycle continuously.
A local plumber from our team at Accountable Home Plumbing shared a valuable tip: "I've seen a lot of DIY sump pump installations fail simply because the discharge line wasn't correctly planned or insulated. Here in Colorado, proper slope and freeze prevention aren't just nice-to-haves—they're must-haves!"
By avoiding these common mistakes, you'll ensure a successful residential sump pump installation, giving you peace of mind and keeping your home safe, dry, and protected!
Maintaining Your Newly Installed Sump Pump
Your freshly completed residential sump pump installation is all set to keep your basement dry and your home safe—congratulations! But, to make sure your sump pump stays reliable and effective for many years, regular maintenance is a must.
With proper care, you can expect your sump pump to last 7-10 years or even longer. Like any hardworking appliance, it needs a bit of TLC to keep things running smoothly. Thankfully, maintaining your sump pump is easy, quick, and well worth your time!
First things first, plan to give your sump pump a "checkup" every 2-3 months. Simply pour some water into the pit and watch your pump spring into action. This quick test helps verify that the float switch, motor, and discharge lines are functioning as they should.
While you're testing, take a moment to clean out the sump pit itself. Over time, dirt, stones, and other debris can collect in the basin, causing clogs or reducing efficiency. Scoop out any junk that doesn't belong, and your sump pump will thank you!
Another piece to keep an eye on is the check valve. Its job is to prevent water from flowing back into the sump pit once the pump shuts off. Listen carefully after the pump stops—if you hear water trickling back, the check valve may need replacing.
The float switch is another key part of your system. After all, this little float tells your sump pump when to turn on and off! Gently move it with your hand now and then to confirm it's floating freely and not getting caught on anything. A stuck float can either keep the pump running constantly or prevent it from activating at all.
Don't forget to regularly inspect your discharge line as well. Walk along the pipe (both inside and outside your home) to make sure there are no leaks, damage, or blockages—especially after severe weather or heavy rains. Keeping the discharge line clear ensures water safely exits your home, away from your foundation.
Each month, press the "test" button on your GFCI outlet to confirm it's functioning properly. Since water and electricity aren't exactly a friendly combination, you want to be confident the outlet will safely trip if there's ever an electrical issue.
For true peace of mind and thoroughness, scheduling an annual professional inspection from the team here at Accountable Home Plumbing can help spot potential problems early (and avoid costly surprises later). Our experienced technicians know exactly what to look for and can ensure your sump pump stays in peak condition.
Here's a quick pro tip: Every couple of years, pull your pump out during dry weather and give it a good soak in vinegar for about an hour. It may sound odd, but vinegar dissolves mineral buildup and keeps your pump looking and working like new!
Seasonal Maintenance Tips
Colorado's changing seasons mean additional care for your sump pump throughout the year:
In spring (around February or March), as snow melts and rain increases, clean your pit thoroughly and test your pump. Check your discharge line to make sure winter didn't leave any surprises behind (like ice damage or debris buildup).
During summer months (June or July), keep an eye and ear out to ensure your pump isn't continuously running. If it is, you might have a stuck float or a leaking check valve. Summer storms can be fierce, so check your backup systems as well.
By fall (September or October), leaves and debris can clog exterior discharge points. Clear these out and clean the pit again to prep your system for colder months. It's also the perfect time to test your pump and backup power to ensure they're ready for winter.
In winter (November through January), freezing temperatures can pose extra challenges. Make sure your exterior discharge pipe slopes downward to prevent standing water that can freeze. Insulate any exposed pipes and check backup power systems to prevent surprises during winter storms and thaws.
As our lead technician at Accountable Home Plumbing explains, "Here in Colorado, the freeze-thaw cycles can really test your sump pump system. Extra winter protection like insulation and regular check-ins during thaws make all the difference."
When to Call a Professional
As much as we value DIY spirit, there are times it's best to call in the pros at Accountable Home Plumbing. If your sump pump starts making strange sounds—grinding, scraping, or rattling for example—don't ignore these warnings! They could signal worn-out bearings or a damaged impeller that needs immediate attention.
If your pump is cycling on and off frequently without much water in the pit, it might indicate issues with the float switch or check valve. A pump that runs constantly could also mean trouble, possibly a stuck float or switch issue, and it’s a good reason for a professional checkup.
Another sign that something is off is inadequate water removal. If your sump pump struggles to clear water from the pit, there could be a clog or the pump may be undersized.
Electrical troubles—like tripped breakers, blown fuses, or malfunctioning GFCI outlets—should always be handled by a professional, immediately. Safety first!
Additionally, visible signs like cracks in the pump housing, damaged cords, or corrosion shouldn't be ignored. An experienced technician can quickly diagnose the issue before it escalates.
Lastly, if your current sump pump is nearing its tenth birthday, an inspection from a professional can help you determine if it’s time to replace it and avoid unexpected failures.
At Accountable Home Plumbing, our friendly and experienced team offers 24/7 emergency service across the Denver Metro area—including Broomfield, Westminster, Thornton, Northglenn, Arvada, Boulder, Denver, and Longmont. We're proud of our upfront, transparent pricing (no hidden surprises here!) and fast, reliable service.
Taking good care of your sump pump doesn't take long, but it pays off big-time in protecting your home, preventing expensive repairs, and giving you peace of mind. With just a little regular maintenance, your home's best defense against water damage will stand strong for years to come.
Frequently Asked Questions about Residential Sump Pump Installation
How long does a residential sump pump typically last?
Most homeowners are surprised to learn that sump pumps don't last forever. The average lifespan of a residential sump pump installation is about 7-10 years, though I've seen well-maintained units last longer.
Several factors affect how long your pump will serve you. Pumps that run frequently during rainy seasons or in homes with high water tables tend to wear out faster than those that only kick on occasionally. The quality of your water matters too – if you're pumping gritty or sandy water, those particles act like sandpaper on your pump's internal components.
Regular maintenance makes a huge difference. Taking the time to clean and test your pump can add years to its life. And of course, investing in a higher-quality pump usually pays off with longer service. Pedestal pumps often outlast their submersible cousins since their motors stay high and dry instead of being submerged.
Your pump will usually give you warning signs before it fails completely. If you notice grinding or scraping noises, that's your pump crying for help. Visible rust or corrosion, inconsistent operation, longer run times, or frequent on-off cycling are all red flags.
As one of our technicians often tells customers: "When your sump pump sounds like it's struggling to breathe, it's likely on its last legs." Don't wait for complete failure – which, ironically, almost always happens during the heaviest rainstorm when you need it most. Consider replacing your pump proactively when these warning signs appear.
Do I need a battery backup for my sump pump?
In my years of plumbing experience across the Denver Metro area, I've seen too many flooded basements after power outages to recommend anything but "yes" to this question. A battery backup system is a smart addition to any residential sump pump installation, particularly if you check any of these boxes:
You live somewhere prone to power outages (which, let's face it, often happen during the same storms that make your sump pump work hardest). Your neighborhood has overhead power lines that are vulnerable during Colorado's notorious spring snowstorms or summer thunderstorms.
Your home has experienced basement flooding in the past. Even once is enough to know how devastating water damage can be to your property and belongings.
You have a finished basement with furniture, electronics, or irreplaceable items. The cost of a backup system is minimal compared to replacing water-damaged possessions.
You're frequently away from home for work or travel. Water damage can escalate quickly when no one's around to address it.
Your primary pump runs often, indicating you have consistent water issues around your foundation.
One of our longtime customers put it perfectly: "Battery backups are worth every penny despite the added expense." Most backup systems provide about 24-48 hours of protection during outages, switch on automatically when power fails, and include alarm systems to alert you when they activate.
At Accountable Home Plumbing, we typically recommend combination systems that integrate both primary and backup pumps for the most comprehensive protection. Think of it as insurance – you hope you never need it, but you'll be incredibly grateful to have it if you do.
Can I install a sump pump in a finished basement?
Absolutely you can! Installing a sump pump in a finished basement is completely doable, though it does require some special considerations to maintain both functionality and aesthetics.
First, you'll need to address flooring. Any floor covering in the installation area – whether carpet, tile, or laminate – will need to be removed. This usually means cutting and removing a section of your finished flooring to access the concrete underneath. Don't worry though – a skilled installer can minimize the disruption and help plan for an attractive finished look.
In finished spaces, appearance matters more. Instead of a utilitarian plastic cover that screams "utility," you might want a more discreet installation with a proper cover that blends with your décor. We've helped many homeowners select covers that coordinate with their basement finishes.
Noise is another consideration in living spaces. Submersible pumps operate more quietly than pedestal models, making them the preferred choice for finished basements. Using insulated discharge pipes can further minimize the operational sounds.
One challenge with finished basements is that water intrusion may be harder to spot until damage occurs. The carpet or drywall can hide moisture problems until they're severe. Consider adding water sensors or alarms in areas away from the sump pit as an early warning system.
A Denver homeowner recently told me: "We were hesitant to install a sump pump in our finished basement, but after experiencing minor flooding twice, we decided it was worth it. Our installer was able to place it discretely in a corner and create a custom cover that matches our flooring. The peace of mind is worth the minor disruption to our space."
While a sump pump is excellent at addressing water once it enters your basement, it doesn't fix the underlying causes. For comprehensive protection in a finished basement, consider combining your residential sump pump installation with exterior waterproofing, proper grading around your foundation, extended gutters and downspouts, and possibly interior drainage systems.
At Accountable Home Plumbing, we're happy to evaluate your specific situation and recommend the best approach for your finished basement. Sometimes a little prevention can save a lot of restoration later on.
Conclusion
Installing a residential sump pump is one of those home improvements you'll be glad you made—especially when heavy rains or melting snow come knocking at your basement door. A sump pump isn't just a mechanical helper tucked away in your basement; it's your home's silent guardian. It protects your property from costly water damage, helps preserve the integrity of your foundation, and even improves your indoor air quality by preventing mold and mildew.
Whether you're rolling up your sleeves to DIY or calling in the pros at Accountable Home Plumbing, understanding the basics of residential sump pump installation is key to long-term success. By choosing the right pump and placing it strategically at the lowest point in your basement, you ensure water is quickly and effectively removed before it causes trouble.
Proper installation makes all the difference. A well-constructed pit, correct pump placement, thoughtful discharge line routing, and safe electrical connections are crucial to an effective system. Skipping any steps or cutting corners can mean headaches down the line (and soggy socks—no thanks!).
And don’t forget maintenance! Regularly testing your sump pump and performing seasonal checks will keep it running smoothly, giving you confidence that it'll jump into action when needed. Consider adding a battery backup system too—because storms love to knock out power right when your basement needs protection the most.
At Accountable Home Plumbing, we've proudly served homeowners throughout the Denver Metro area—including Broomfield, Westminster, Thornton, Northglenn, Arvada, Boulder, Denver, and Longmont—for years. Our seasoned technicians are experts at residential sump pump installations, emergency plumbing fixes, and routine maintenance. And we pride ourselves on transparent, upfront pricing—no hidden surprises here!
If you’re ready to protect your home from unexpected flooding or just want peace of mind during storm season, our friendly and knowledgeable team is here 24/7. Visit our services page or contact us today.
Your dry, safe, and worry-free basement is closer than you think—and we’d love to help make it happen!